Wednesday 27 March 2013

P.B. Vintage Dice - Vase Filler

Pottery Barn Knock Off-
Vintage Dice - Vase Filler
Theirs (Pottery Barn)
Mine
My family always played games growing up. You know, old school board games and card games, not video games like today. We used to have family game night when my kids were young too. It is a great way to spend family time together. So when I saw the vase filler dice on Pottery Barn it brought back memories. I wanted them but we don't have a pottery barn close by and I thought it would be a fun project to do.
If you are going to do this project as well, I suggest making as many as you are going to want 
all at once. The assembly line works great for this project.
First measure off the blocks so that the sides will all be even. The thickness of this wood dictated that they would be 1-3/4" square blocks. I decided I wanted three pairs of dice, each pair a different colour combination. In hindsight I wish I had made at least one more pair to fill my jar properly. Sigh.
Next I made a template on paper so I could evenly measure out the dots.  A template made sense since I was making 6 of these. I used a nail as a marker for the dots also because it makes a good starter hole for the drill bit, so it doesn't slide out of place.
Then I sanded all of the edges...
and the corners as well (they roll better that way).
Started drilling for the dots. Be sure not to go to far or you will have holes, you only want round indentations for the dots.
The next step is kind of a pain but necessary when working with raw wood.
Seal the wood with either a  water-based sealant or watered down layer of acrylic paint will do mostly the same thing. It raises the grain of the wood and after you sand it down it will be really nice and smooth and ready for painting. If you skip the sealing the wood, then once you apply your paint it will still raise the grain (the moisture does it) and your paint surface will not be all nice and smooth. It is worth the extra effort.
Then paint! 
I painted the dots first as I thought this would be easier. But I had to go back and touch up the dots after I painted the sides anyways, so maybe the other way around would have been better.
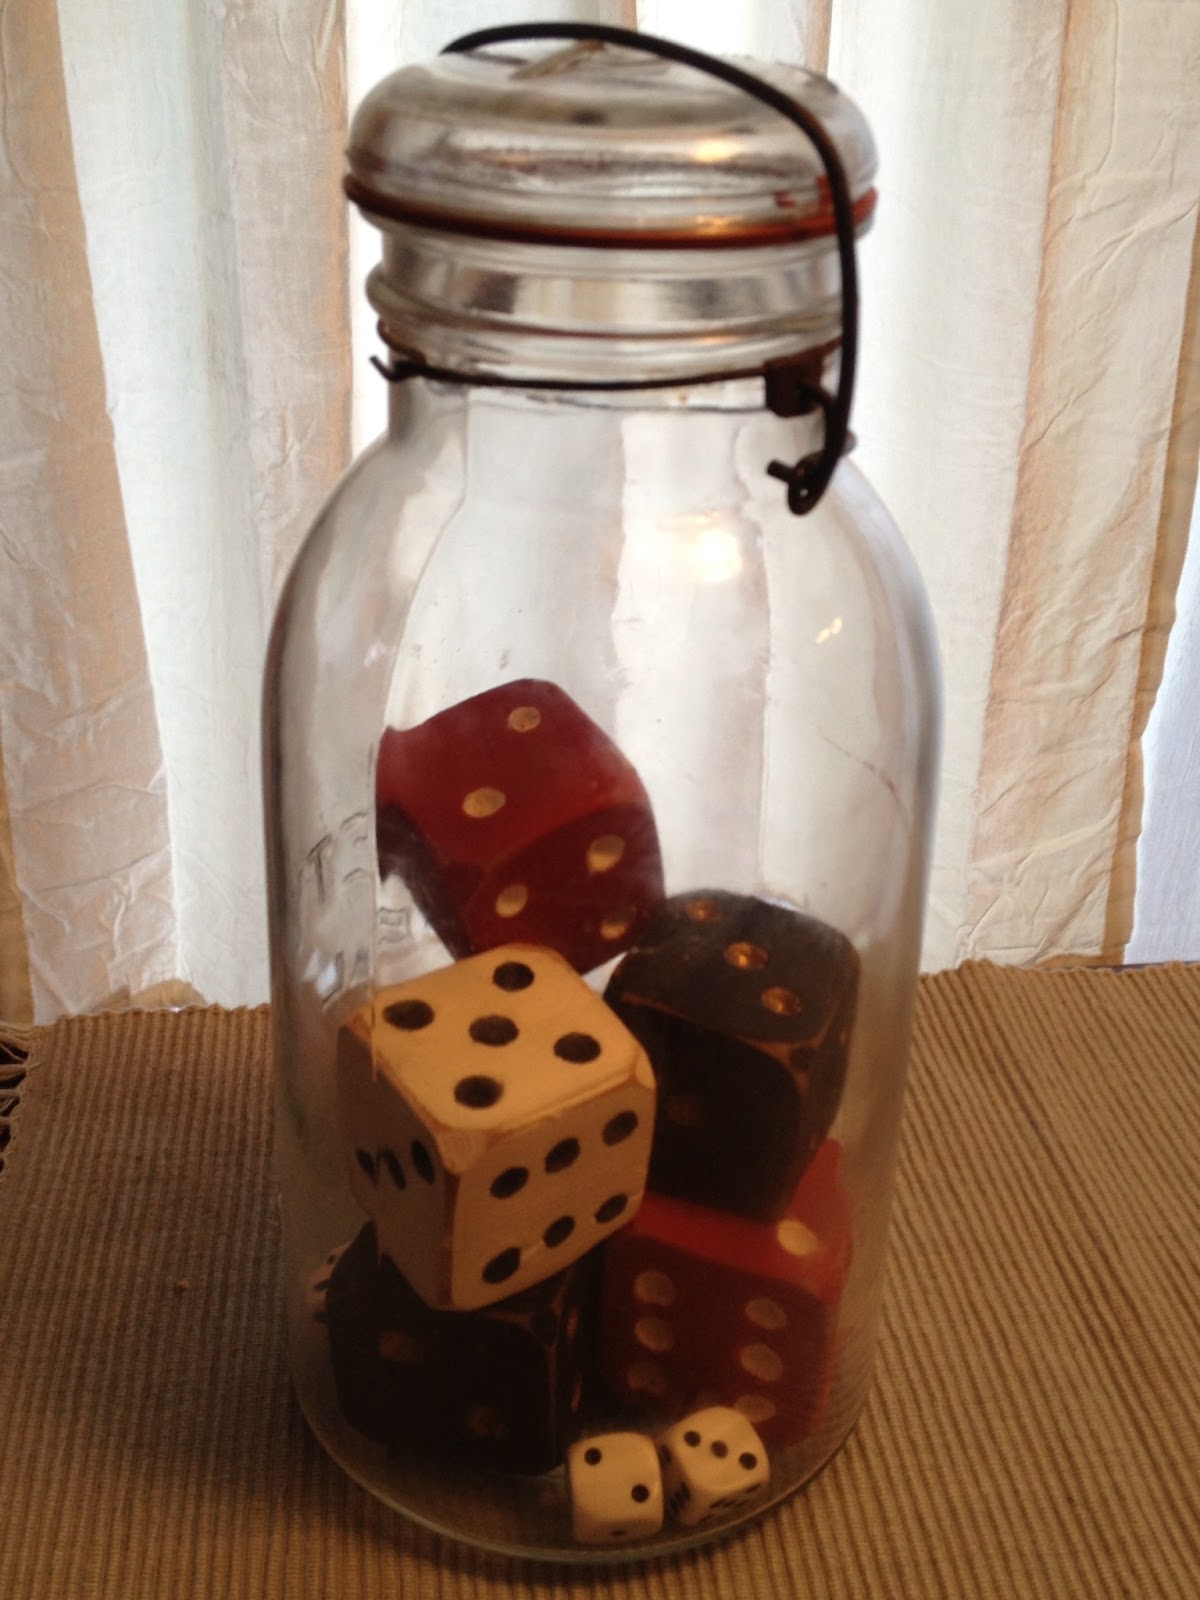
I painted one pair - red with white dots, one pair- black with metallic gold dots and of course the classic - white with black dots. I used acrylic craft paints that I had on hand.
Then  I sanded the edges a little to give it an aged look and waxed them with furniture wax to protect the finish.
It didn't quite fill my vintage jar but I added some regular size dice as well and it looks pretty good I think.
People that have seen them can't believe that they are handmade. So I'll take that as a compliment :0)

Thursday 14 March 2013

Re-vamped Sign

Have you ever seen something interesting, grabbed it to look at it more closely, then sadly put it back because there was something not quite right about it?
Sometimes that treasure really only needs a little tweaking to be perfect. 
Don't put it back on the shelf. 
Ask yourself first "Does it have good bones? Can I change it?
How much work is involved? And is it worth it at that price?"   
If the price is reasonable and you think you can do something with it, don't give up on it. Rescue it! 
After all, there was something about it that drew you to it in the first place. 

For instance one day at my local thrift shop I found this rather boring faded little tin sign with the word "GARDEN" in big chunky block letters.
 (This is the back side, sorry don't have a picture with the front. 
But it was much like this, with ugly brown lettering)

 The sign did have some redeeming features though. 
Such as the shape and the lovely embossed details framing it.


All it took was a few coats of paint (Miss Mustard Seed's - Milk paint of course).
First the blue and then the white in the center panel.


The thing that took me the longest was deciding what it should say. It reminded me of a little french cafe sign, so that's what it became. Personalized for me of course! I used graphite paper to transfer the lettering and painted it black.


 Distressed it a bit.


Then antiqued it to bring out the details of the embossing and to age it of course. 


Added some twine to hang it and Voila!
Have to say, I really do love it now. And to think I almost didn't buy it.


Monday 4 March 2013

Antiqued Mirror


Re-purposed cabinet door into "Antiqued Mirror"

 At my favorite Salvage store I discovered this old cabinet door. Actually there were two. One was in great condition (not my cup of tea!) and the other door the mirror was distressed and yellowing (Score!). It was only $12. I was so excited, couldn't wait to do this project. 

So what to make out of a mirrored cabinet door? Well, a mirror of course! 
I know that it doesn't take a whole lot of creativity to come up with that. But sometimes these salvaged finds only need a little bit of a helping hand to be something "new" and useful again.

Unfortunately I didn't take a picture of the whole door before I got started. Too anxious to get going! 
The door had some hardware that I had to remove first. Namely a keyhole and some other bits that I discovered when I trimmed the one side to match the other. (The bottom was taller than the top. But I was going to be using it horizontally so I wanted them even). 
 
Once I removed the hardware, I filled the holes left by them with modelling paste. Its all I had on hand, and it is paint-able as well. Normally I would use wood putty, but I didn't want to run out to the store and this did the trick just as well.


I had bought some ornamental wood moldings from my local Home Depot ($7), and glued them on each side to add a bit of interest.
 I then painted the moldings, and the side that I had cut, a brown color with some inexpensive acrylic craft paint ($1) in a shade to closely resemble the color of the door. I then taped off the mirror for the next step. 
I used "Miss Mustard Seed's- Milk Paint" in "Ironstone" over the whole piece. I knew the moldings wouldn't chip or peel with the paint because that wood wasn't sealed, but I was hoping the rest of it might. It didn't. It just didn't want to co-operate with me on this one. So I used my method (See my earlier post "Milk Paint tips") to get some chipping. I also sanded down the white paint on the edges and on the moldings just a bit to reveal some of the brown craft paint underneath. 
I then sealed it with "Miss Mustard Seed's- Antiquing Wax" on the moldings to bring out the details and in some random areas to help age it. Then "Miss Mustard Seeds"- Clear "Furniture Wax" over the rest of it to protect it. 
Added some hanging hardware. And Voila! My $20 "Antique" mirror was complete!