Wednesday, 30 January 2013

Fabulous Victoria

So I finally got my act together and went through some of my photos of Victoria. No small feat I want to say, I have hundreds of photos just of Victoria.... I am not a great photographer by any means, but hopefully some of these photos will give you an idea of what I am talking about. And for our friends & family, yes this is me trying to entice you to come visit!
I will be posting photos of Greece, Italy, Holland and some of the other countries we have visited periodically. So keep checking.
 The Old Janion Building. Love this!!! I wanted to buy this building (when I win the lottery of course!) and make loft apartments (one of them for me & hubby) and shops below (one for me to sell my projects and paintings). Apparently somebody has already bought it and is doing just that. (Though I don't imagine they know about the apartment or shop for me...yet. Still waiting on that lottery win!)
 There is lots of great architecture here in Victoria.
 And ghosts too! The Maritime museum (above) is supposed to be very haunted. I still have to do that ghost tour of Victoria. Should be fun.


This is China town obviously. 


It is supposed to be the oldest China town in all of North America. 
Who knew? (might possibly be the smallest one too!) Still good though. 

Check out The Fan Tan Cafe and order the Won Ton Soup. It has everything but the kitchen sink in it. A meal for two!

As I was doing this, I again thought how much I love this place.

Thursday, 24 January 2013

Tin Ceiling Tiles


Tin Ceiling Tiles

It all started with these tin ceiling tiles that I picked up at a local salvage shop. As you can see, the tile in the middle (or more accurately partial tile) has a multi-colour patina. Not sure where these colors come from. Possibly from a reaction of the metal to a fire in the house that it was recovered from, as there was also a soot-like residue on the back and what little paint remains is cracked. Whatever the case, I love the effect.
Now what to do with it? Why frame it and hang it on a wall of course. :0) 
After I cleaned off the soot, I cut it in half and used some 'Hemp Oil' to brighten up the front of the tile.
Now to frame it...
I knew I wasn't going to find any frames to fit, so I decided to make my own. So with some stock molding that I picked up at my local 'Restore' I started.
I ended up using a molding that had a channel to slide the tile into. Not sure what kind of molding it is, perhaps something for window frames? It wasn't as wide as I wanted, so I bought some small crown molding that I could butt up against it. Then after much trial and error I got all of the pieces cut. Lots of mis-cuts since the tile wasn't perfectly square, which I discovered after. Painted the pieces with 2 coats of milk paint. (Which incidentally doesn't crack on raw wood.) Then I put it together with a few nails and mounted it on a 1/8 " plywood backing.

I used some gold 'Rub and Buff' to highlight the middle raised edge and sanded here and there to "antique it". Finally I put two coats of 'Miss Mustard Seeds - Clear Furniture Wax' and buffed it. This helps to seal and protect the milk paint.
Here is the finished project:


I am quite happy with the frame, not too bad for a beginner. Now I also have several other larger tiles that I plan to frame as well. Not sure when that is going to happen but I will post those pics as well. Ciao.


Sunday, 13 January 2013

Parts Drawer Re-purposed

Parts Drawer Re-purposed
Okay so here it is, the pics of my first project with Milk Paint. It is a wooden drawer with many little compartments. I think it was used for keeping machine parts in or maybe letters and numbers for printing?
I found it at my local salvage store. My new favorite treasure trove.
Here it is before:

And after:
Thanks for checking it out. Let me know what you think of it. Be honest, I can take it. Well, not brutally honest though okay? 

And for those who are interested, I made a quick tutorial. (Okay, not super quick, but quick for me at least.)

Let me just explain a little about milk paint first. I used "Miss Mustard Seed's Milk Paint" which I bought at this great store downtown Victoria "Sweet Peas AT HOME" (you can buy it on-line too I believe). The owner, Debbie was very helpful and had some great pieces of furniture that she had used the paint on. Very inspiring. The paint comes in powdered form that you have to add water to. It is not like latex paint or oil based paints in that you cannot control the outcome. Milk paint chips and flakes and gives a rustic time worn look. You never know when you apply it how much, or even if the paint will flake and chip. I believe the finish you apply it over has a lot to do with this but even then apparently it is not totally predictable. So I figured that since the drawer had a matte varnish on it that the milk paint would resist somewhat. 
Here it is after the second coat. I mixed it a bit too thin I think, so the first coat was more like a stain. You can see where the second coat went over where it had already peeled off.

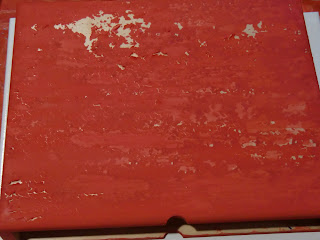
I wasn't expecting much else to happen at that point but well as you can see the second layer actually caused the paint to chip not only where it had the first time but also even more in the other areas as well.

So by the time it was done, it had chipped a lot more than I had expected. (and here I was worrying that it wouldn't chip at all!)

I used a paint scraper tool very gently to remove the flakes. You can also use it with a little more pressure to remove paint where it doesn't want to chip off. 

 The second coat ended up making it look more rustic than I had planned on, but well you just have to go with it. The drawer however didn't flake off much at all. But I did inadvertently help it along a bit. You see, I had painted the inside of the drawer black first and then taped it off and painted the red around the edges. 
When I removed the tape, I also ended up removing some of the black paint as well. I was okay with this though as it seemed to go better with the drawer casing.
 I then took some antiquing wax and applied this all over. 
It deepened the color(which I liked) and helps to seal it and protect it from further flaking.
Then I just put it together with the addition of some drawer stops to prevent it from falling out (I plan to hang it on the wall),some trinkets and scrabble letters in the compartments, and picture hanging hardware on the back.
It was a lot more work than I thought it would be(painting those compartments with two coats and a coat of wax took forever), but in the end I learned a lot about milk paint (both what to do and what not to do) and it was fun. I will definitely be doing this again. On a larger project next time. Probably with different colors and probably with very different results. 
Ciao!

Thursday, 10 January 2013

New year, New blog.
I know, I know, technically not really the New Year anymore, but close. Well no-one ever accused me of being too punctual :0)
I actually have very good intentions but also, sadly, a very bad sense of time appreciation. I always seem to think I can get things done a lot faster than I really can. I think this in part is due to my need for perfection (as I see it) or O.C.D as my son calls it, and also a bit of A.D.D. (I frequently get side-tracked and it takes a real concentrated effort sometimes to stay with the program).
I had in fact actually started a blog with the assistance of my wonderful technical expert (my son Ryan), last March. But a lot of stuff happened last year and unfortunately that didn't include the blog.
One of my New years resolutions this year is working on my commitment issues. I wasn't really aware that this was an issue for me actually until just recently. After all, my awesome husband, Doug and I have been married now for 23 years!!! But there is also the fact that I also have held more than 15 different jobs and moved more than a dozen times (including 3 countries and two continents)and still I don't know what I want to do for a living or where I want to settle down permanently (my forever home).
Well, I guess that means when I do have a good thing I know to hang on to it (my husband that is) and as for the rest I am still searching.
So now that I have more time on my hands and a re-newed sense of optimism. I am beginning again. I will not make the same mistake as I did on my last blog where I committed myself to posting a new project once a week.  (What the heck was I thinking?!)
But after the first project was completed, things got delayed. Because,.... well, life just gets in the way sometimes. And perhaps there was a bit of a commitment issue as well.
So I abandoned it.
Pathetic I know. But I got over it,....... rather quickly, truth be told.
So here's to seeing if I can follow through. (I have bullied my daughter, Brandy into following my blog so she can be my conscience in case I start to slip in my postings. I think she will revel at the chance to nag me for a change.)
So the next posting here will be of my first project of the year which involves the use of milk paint, something new to me that I am pretty excited about.
Ciao for now!